Using NVIDIA GPU Resources Table of Contents
Remove default driver Check the default driver is existing or not
sudo lshw -C display
List the default driver
lsmod | grep nouveau
If "nouveau" appears, it means there is a default driver.
Delete the default driver and reboot
cat <<EOF | sudo tee /etc/modprobe.d/blacklist-nouveau.conf
blacklist nouveau
options nouveau modeset=0
EOF
sudo update-initramfs -u
sudo reboot
Install NVIDIA CUDA
sudo apt-get update -y
sudo apt install -y build-essential linux-headers-$(uname -r) wget
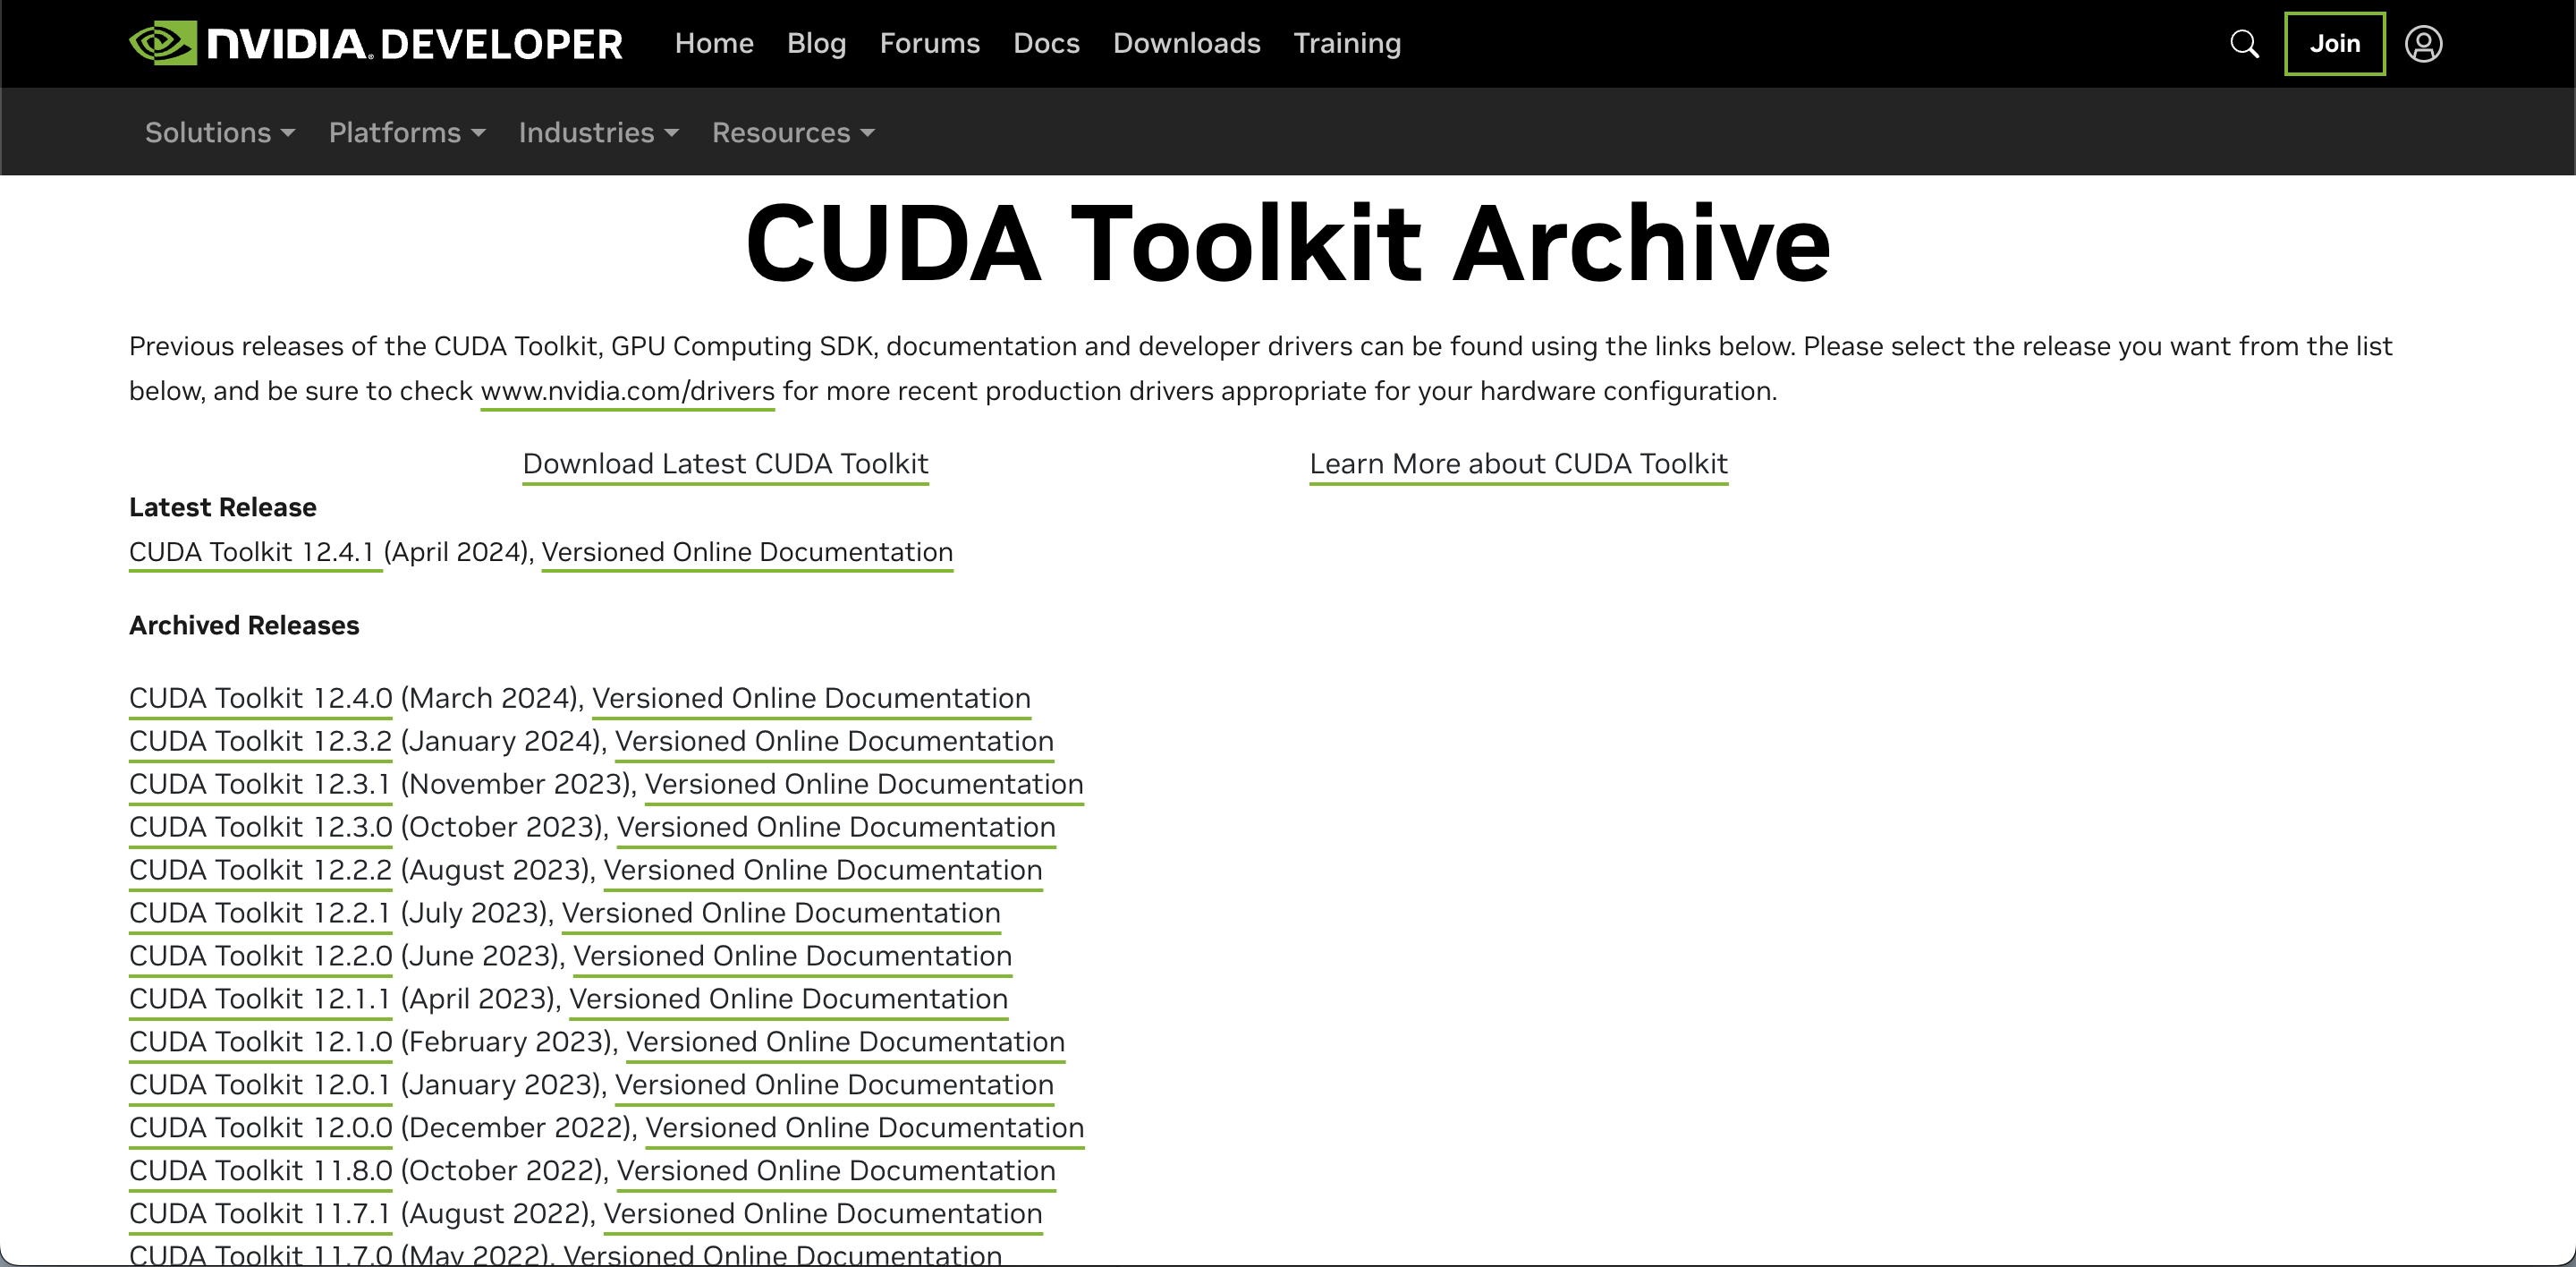
Download the required CUDA Toolkit version from the NVIDIA official website
NVIDIA CUDA Toolkit Official Download Website
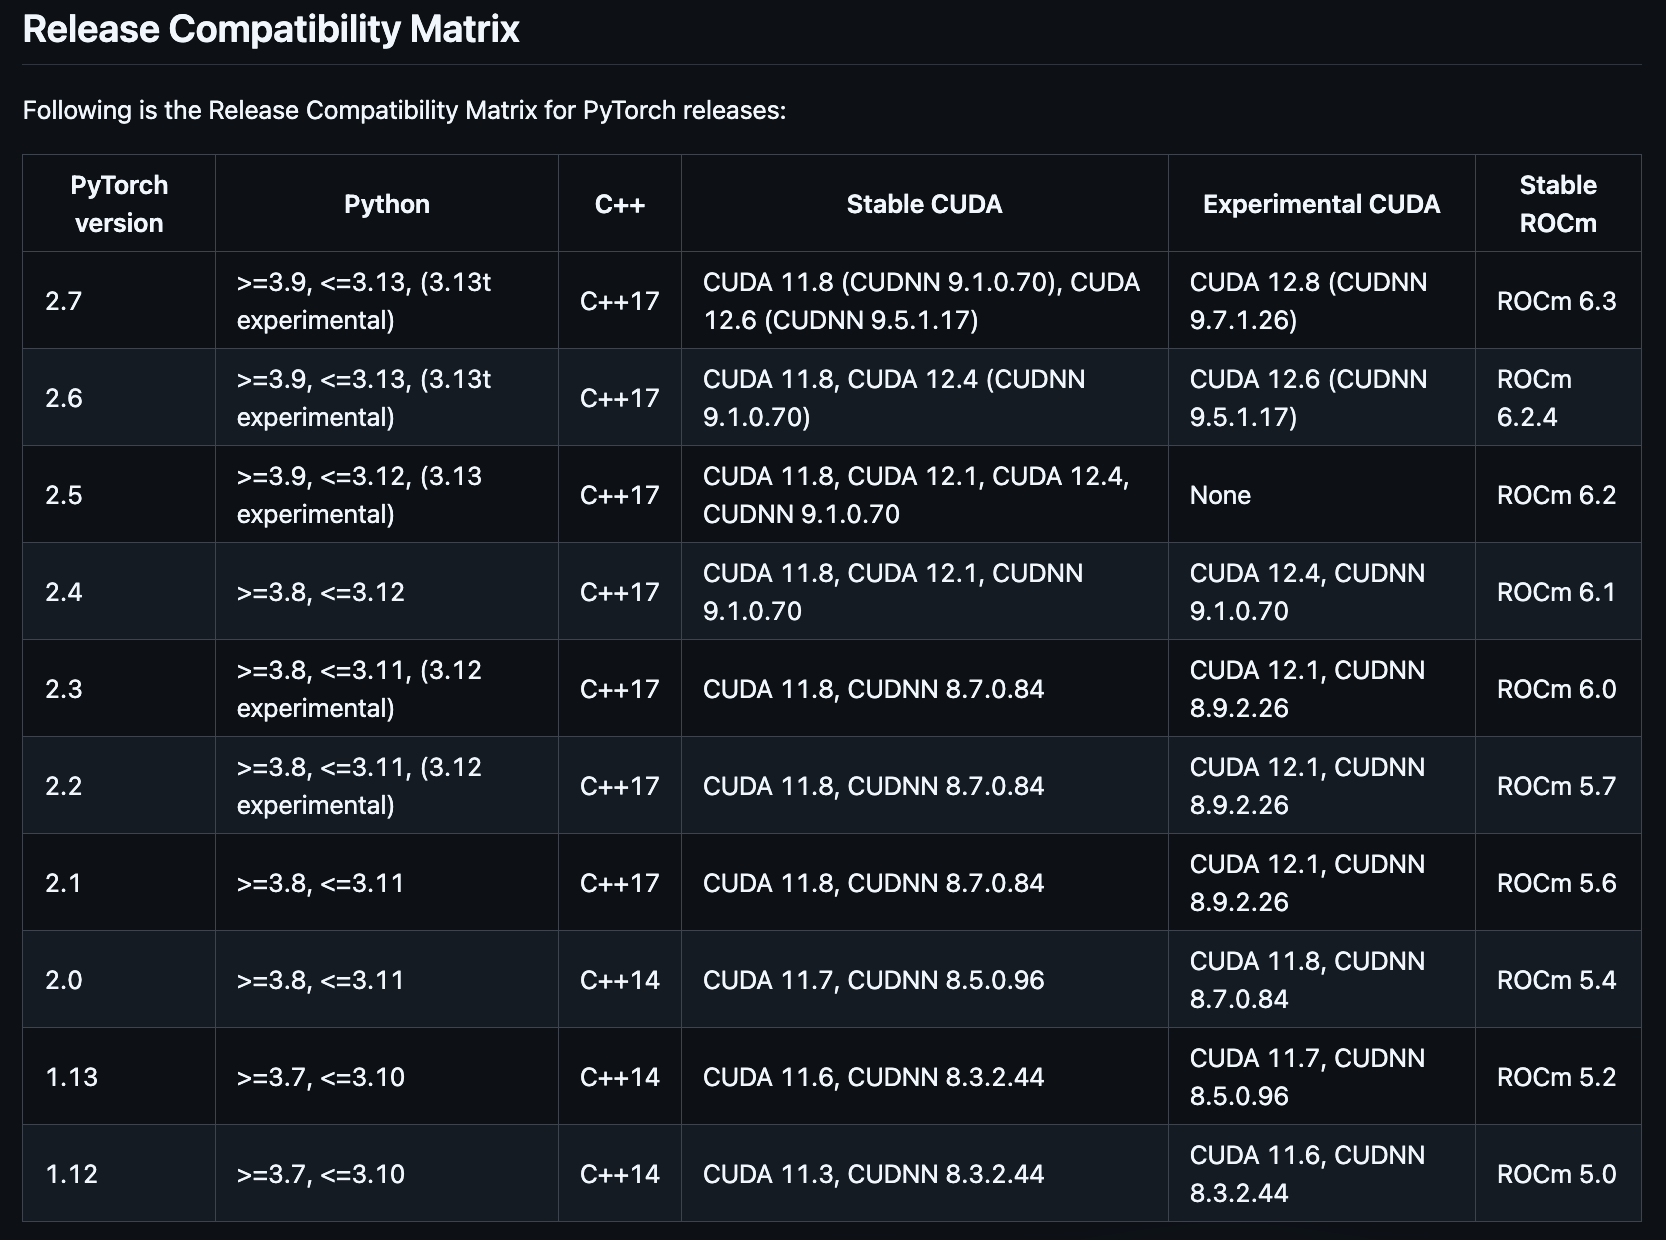
It is recommended to refer to the Stable CUDA version specified in the official PyTorch RELEASE.md .
Note: If you are using a newly released GPU model, such as the RTX 5090, it is recommended to install an Experimental version of CUDA.
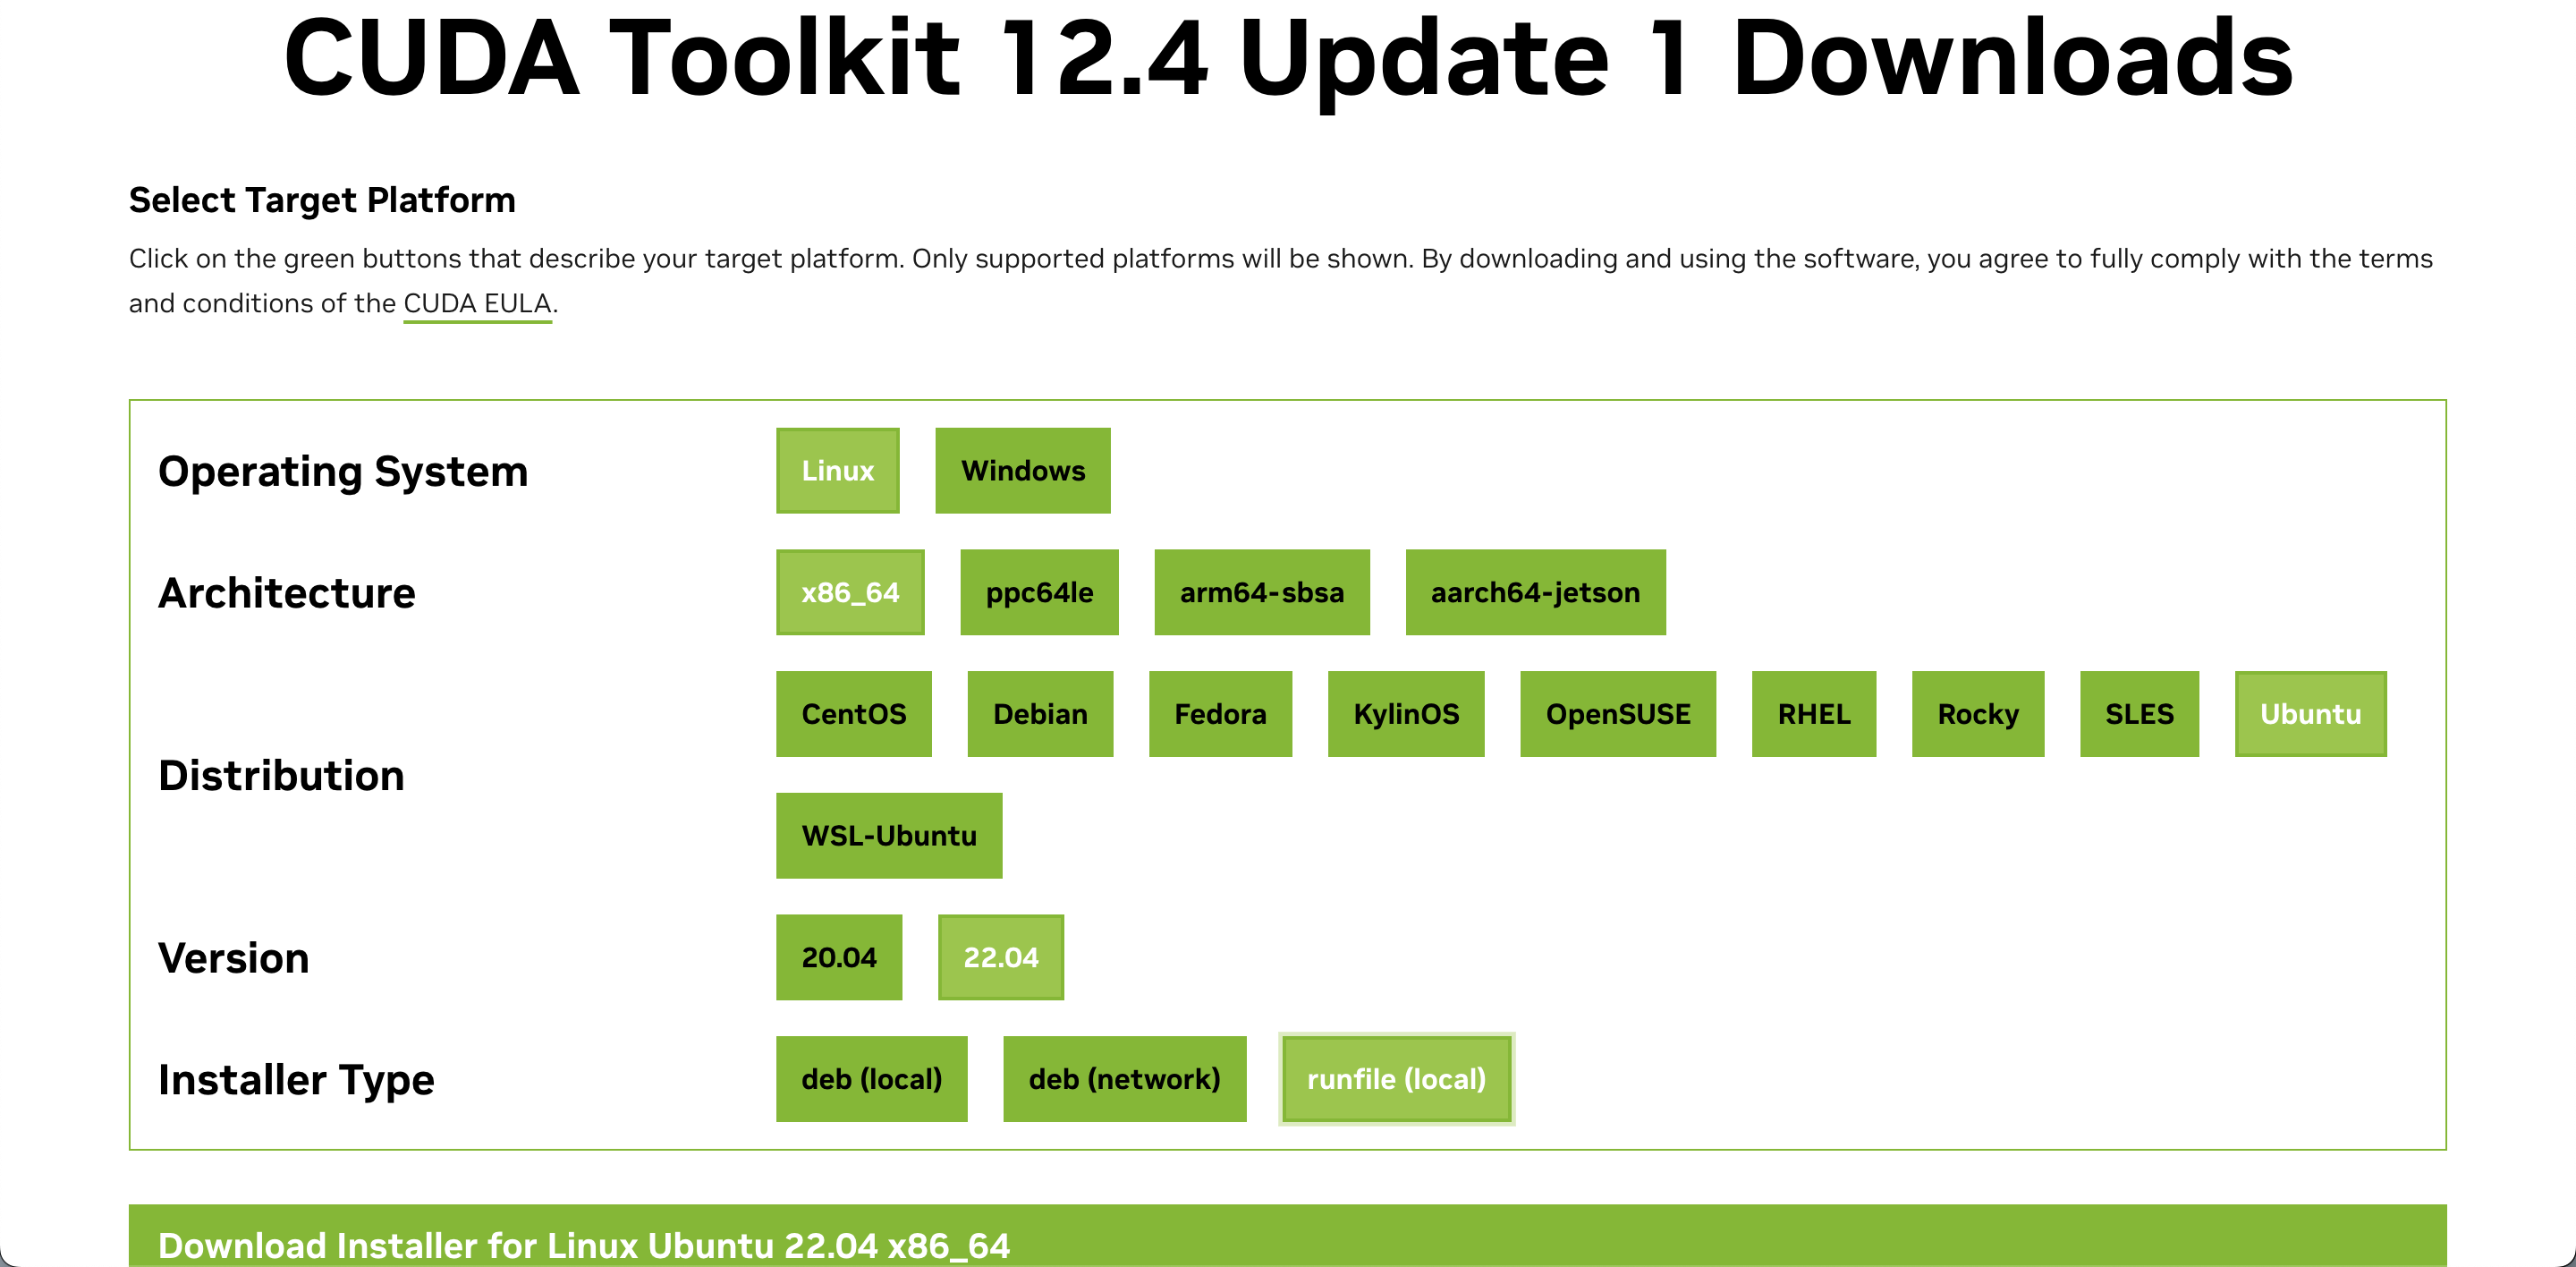
The environment demonstrated here is
Note: If you are using the Ubuntu Desktop for the operating system, you maybe occur the error such as X-Server is running, please exit the X-Server before installing CUDA during the installation. In this case, you need to stop the X-Server first.
You can follow the steps below to stop the X-Server and install CUDA.
sudo systemctl stop gdm
sudo systemctl set-default multi-user.target
wget https://developer.download.nvidia.com/compute/cuda/12.4.1/local_installers/cuda_12.4.1_550.54.15_linux.run
sudo sh cuda_12.4.1_550.54.15_linux.run
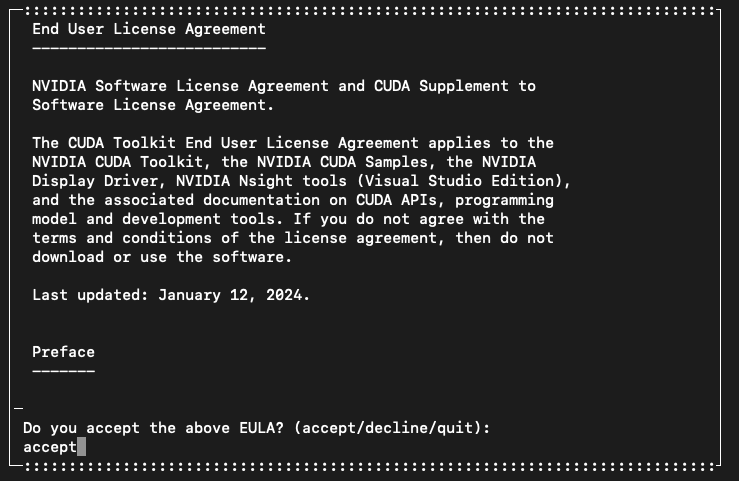
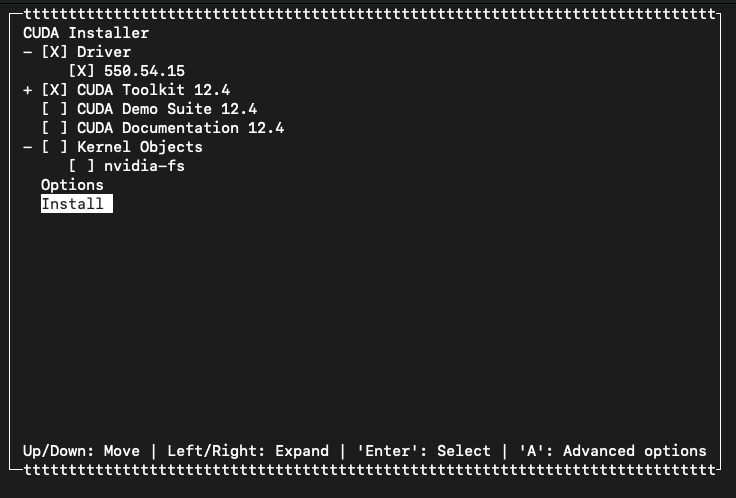
After execution, you will see a UI-like installation menu. Enter accept to accept the terms of use
Use the space bar to select "Driver" and "CUDA Toolkit"
After the installation is complete, add the following two lines to the end of ~/.bashrc
nano ~/.bashrc
export PATH=/usr/local/cuda/bin:$PATH
export LD_LIBRARY_PATH=/usr/local/cuda/lib64:$LD_LIBRARY_PATH
source ~/.bashrc
Note: If you are using zsh, you need to add the above two lines to ~/.zshrc instead. And run source ~/.zshrc to apply the changes.
Check NVIDIA CUDA
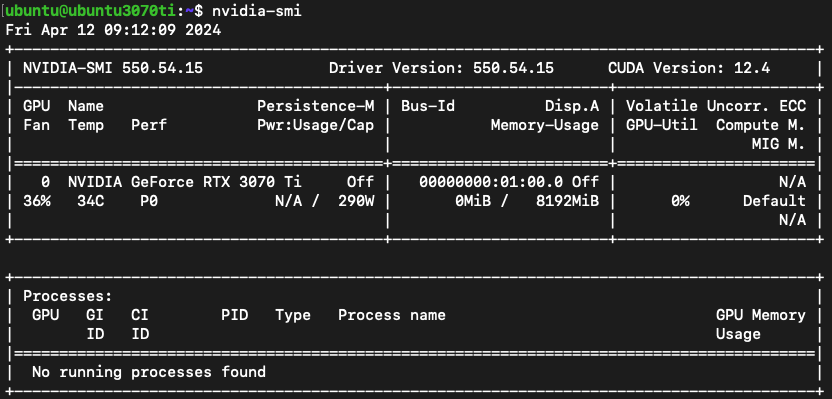
nvidia-smi
nvcc --version
Install NVIDIA cuDNN Download the required cuDNN version from the NVIDIA official website
Note: The cuDNN version can refer to the Stable CUDA version specified in the official PyTorch RELEASE.md .
NVIDIA cuDNN Official Download Website
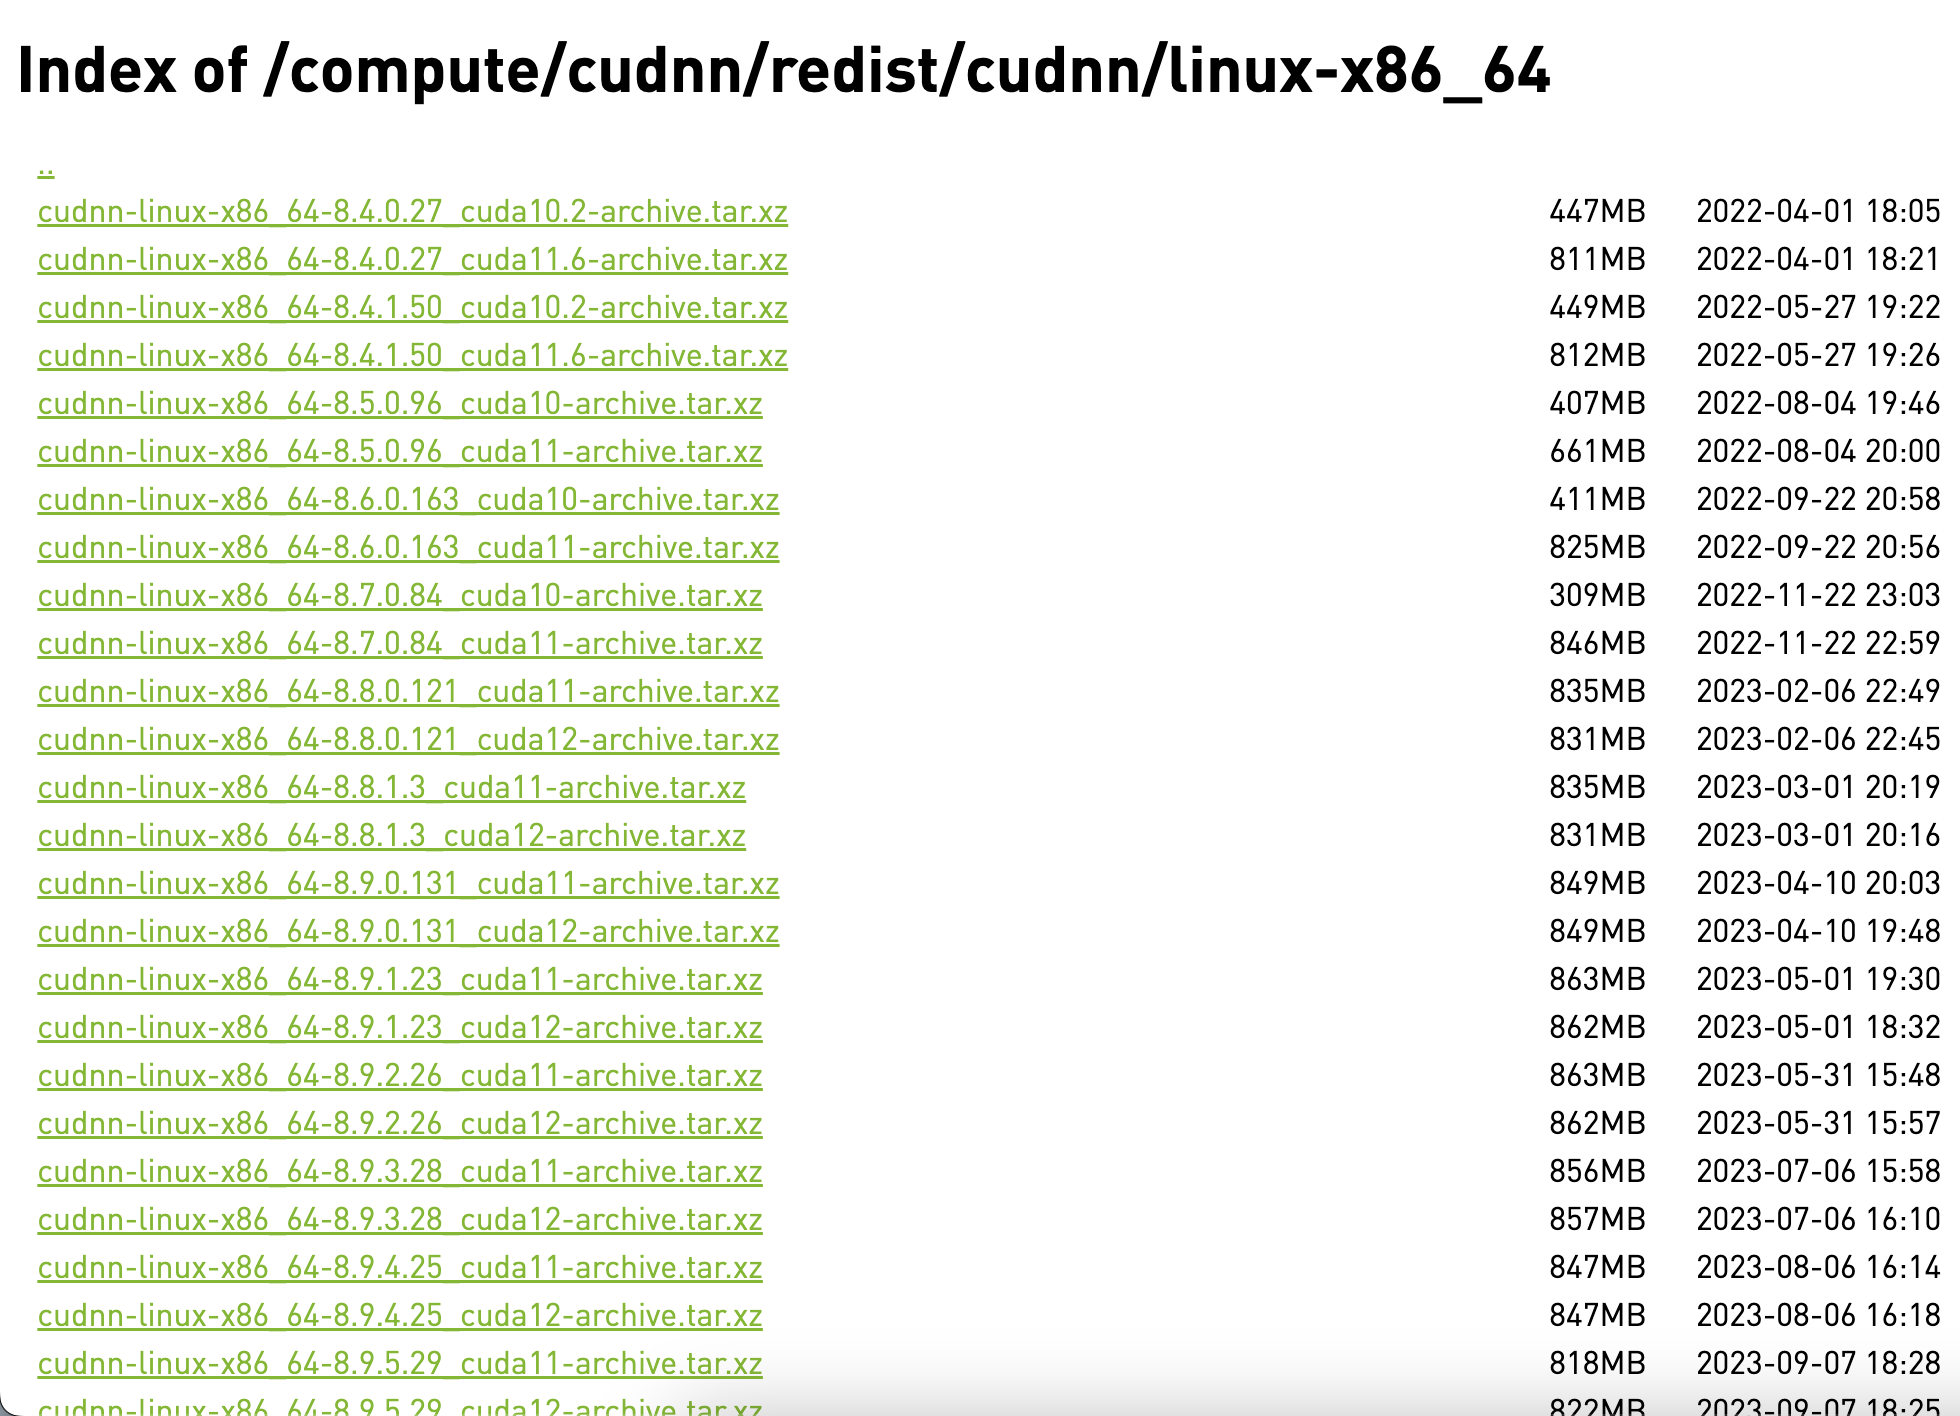
The system environment here is Ubuntu 22.04 x86_64, so choose linux-x86_64/
Here we take cudnn-linux-x86_64-8.9.7.29_cuda12-archive.tar.xz as an example
wget https://developer.download.nvidia.com/compute/cudnn/redist/cudnn/linux-x86_64/cudnn-linux-x86_64-8.9.7.29_cuda12-archive.tar.xz
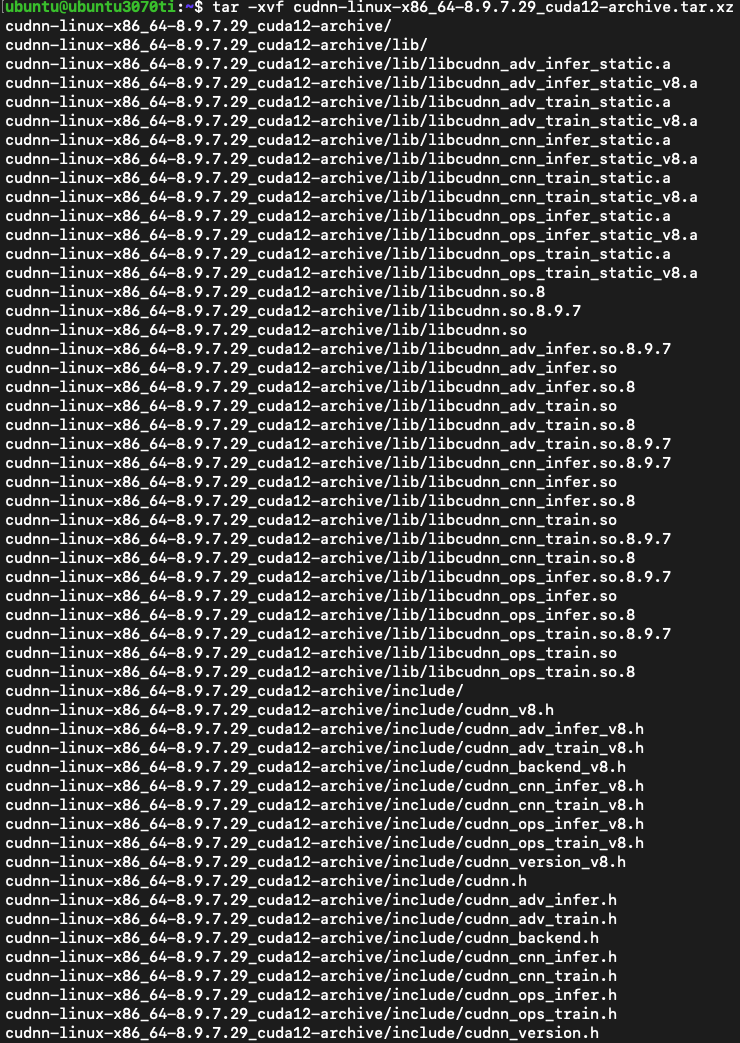
tar -xvf cudnn-linux-x86_64-8.9.7.29_cuda12-archive.tar.xz
sudo cp cudnn-linux-x86_64-8.9.7.29_cuda12-archive/include/cudnn*.h /usr/local/cuda/include/
sudo cp -P cudnn-linux-x86_64-8.9.7.29_cuda12-archive/lib/libcudnn* /usr/local/cuda/lib64
sudo chmod a+r /usr/local/cuda/include/ /usr/local/cuda/lib64
cat /usr/local/cuda/include/cudnn_version.h | grep CUDNN_MAJOR -A 2
Install DKMS
sudo apt-get update -y
sudo apt install -y dkms
# NVIDIA Driver Version 可以透過 nvidia-smi 取得,例如:550.54.15
sudo dkms install -m nvidia -v <NVIDIA Driver Version>
Using NVIDIA GPU resources on Docker NVIDIA Container Toolkit Official Installation Guide
Installing with Apt Configure the production repository
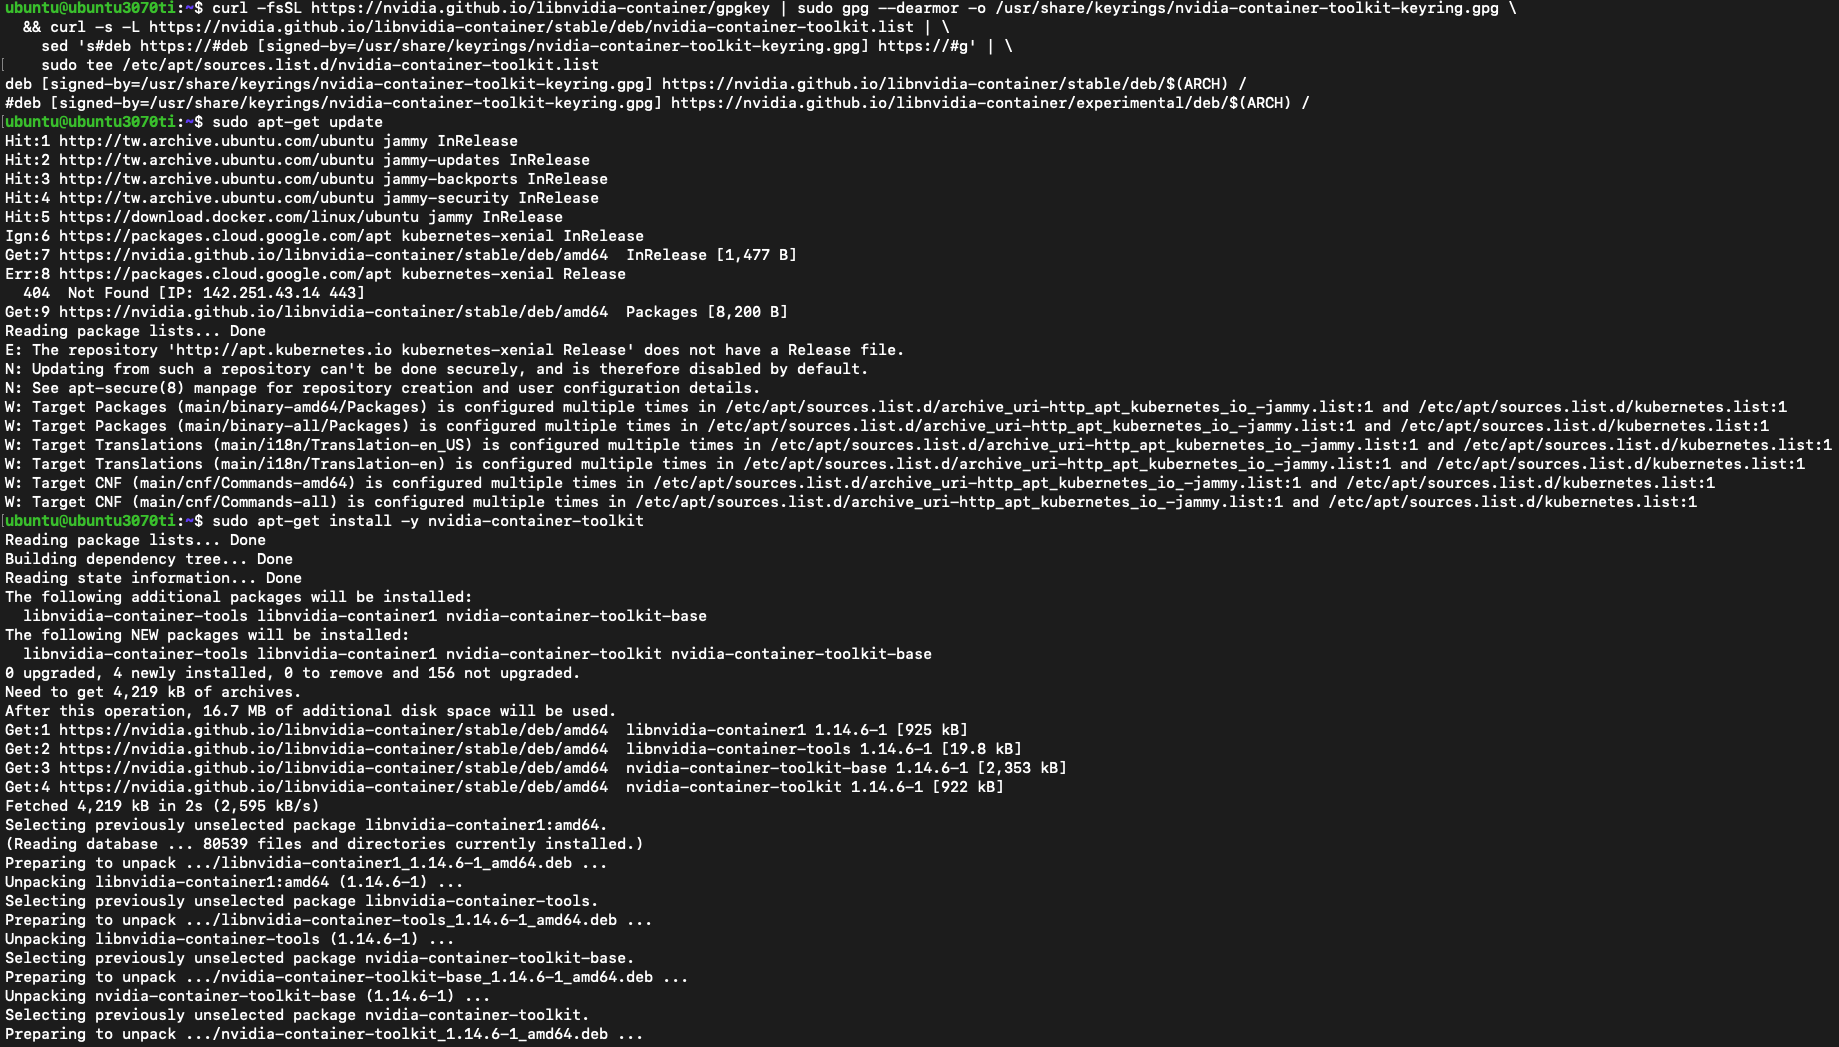
curl -fsSL https://nvidia.github.io/libnvidia-container/gpgkey | sudo gpg --dearmor -o /usr/share/keyrings/nvidia-container-toolkit-keyring.gpg \
&& curl -s -L https://nvidia.github.io/libnvidia-container/stable/deb/nvidia-container-toolkit.list | \
sed 's#deb https://#deb [signed-by=/usr/share/keyrings/nvidia-container-toolkit-keyring.gpg] https://#g' | \
sudo tee /etc/apt/sources.list.d/nvidia-container-toolkit.list
Update the packages list from the repository
sudo apt-get update
Install the NVIDIA Container Toolkit packages
sudo apt-get install -y nvidia-container-toolkit
sudo nvidia-ctk runtime configure --runtime=docker
sudo systemctl restart docker
Confirm whether /etc/docker/daemon.json has correctly configured NVIDIA GPU runtime, similar to the following information
cat /etc/docker/daemon.json
{
"exec-opts": [
"native.cgroupdriver=systemd"
],
"log-driver": "json-file",
"log-opts": {
"max-size": "100m"
},
"default-runtime": "nvidia",
"runtimes": {
"nvidia": {
"args": [],
"path": "nvidia-container-runtime"
}
},
"storage-driver": "overlay2"
}
If you follow the official steps but do not automatically set default-runtime to nvidia, you need to manually add it.
sudo nano /etc/docker/daemon.json
sudo systemctl daemon-reload
sudo systemctl restart docker
Validation Check Container can run GPU Jobs or not Run the following command to check if the NVIDIA GPU resources can be used in Docker.
If the command runs successfully and displays the GPU information, it means that the NVIDIA GPU resources can be used in Docker.
docker run --rm --gpus all ubuntu:latest nvidia-smi
The output should look similar to the following, indicating that the GPU resources are available.
Using NVIDIA GPU resources on Kubernetes NVIDIA Container Toolkit Official Installation Guide
Installing with Apt Configure the production repository
curl -fsSL https://nvidia.github.io/libnvidia-container/gpgkey | sudo gpg --dearmor -o /usr/share/keyrings/nvidia-container-toolkit-keyring.gpg \
&& curl -s -L https://nvidia.github.io/libnvidia-container/stable/deb/nvidia-container-toolkit.list | \
sed 's#deb https://#deb [signed-by=/usr/share/keyrings/nvidia-container-toolkit-keyring.gpg] https://#g' | \
sudo tee /etc/apt/sources.list.d/nvidia-container-toolkit.list
Update the packages list from the repository
sudo apt-get update
Install the NVIDIA Container Toolkit packages
sudo apt-get install -y nvidia-container-toolkit
Before execute NVIDIA containerd for Kubernetes configure command, copy original containerd config.toml (in /etc/containerd) file to current directory first.
sudo cp /etc/containerd/config.toml ./config.toml
Then, execute NVIDIA containerd for Kubernetes configure command
sudo nvidia-ctk runtime configure --runtime=containerd
Next, copy content of /etc/containerd/config.toml into config.toml in current directory
Such as below of [plugins."io.containerd.grpc.v1.cri".containerd.runtimes.nvidia] and [plugins."io.containerd.grpc.v1.cri".containerd.runtimes.nvidia.options] section
[plugins]
[plugins."io.containerd.grpc.v1.cri"]
...
[plugins."io.containerd.grpc.v1.cri".containerd]
default_runtime_name = "runc"
...
[plugins."io.containerd.grpc.v1.cri".containerd.runtimes]
...
[plugins."io.containerd.grpc.v1.cri".containerd.runtimes.nvidia]
privileged_without_host_devices = false
runtime_engine = ""
runtime_root = ""
runtime_type = "io.containerd.runc.v2"
[plugins."io.containerd.grpc.v1.cri".containerd.runtimes.nvidia.options]
BinaryName = "/usr/bin/nvidia-container-runtime"
SystemdCgroup = true
Next, update default_runtime_name from runc to nvidia.
Such as below [plugins."io.containerd.grpc.v1.cri".containerd] section
[plugins]
[plugins."io.containerd.grpc.v1.cri"]
...
[plugins."io.containerd.grpc.v1.cri".containerd]
default_runtime_name = "nvidia"
...
[plugins."io.containerd.grpc.v1.cri".containerd.runtimes]
...
[plugins."io.containerd.grpc.v1.cri".containerd.runtimes.nvidia]
privileged_without_host_devices = false
runtime_engine = ""
runtime_root = ""
runtime_type = "io.containerd.runc.v2"
[plugins."io.containerd.grpc.v1.cri".containerd.runtimes.nvidia.options]
BinaryName = "/usr/bin/nvidia-container-runtime"
SystemdCgroup = true
Finally, restart containerd service
sudo systemctl restart containerd
Install Method
Method 1: Install NVIDIA GPU Operator NVIDIA GPU Operator Official Documentation
Prerequisites: Install Helm
curl -fsSL -o get_helm.sh https://raw.githubusercontent.com/helm/helm/master/scripts/get-helm-3 \
&& chmod 700 get_helm.sh \
&& ./get_helm.sh
Add the NVIDIA Helm repository
helm repo add nvidia https://helm.ngc.nvidia.com/nvidia \
&& helm repo update
Install the GPU Operator
Option 1: Install the Operator with the default configuration
helm install --wait --generate-name \
-n gpu-operator --create-namespace \
nvidia/gpu-operator \
--version=v24.9.0
Option 2: Install the Operator with the specify version GPU Operator Version and dependent version list of related Components
GPU Operator Version
CUDA Version
Driver Version
Container Toolkit Version
Device Plugin Version
v24.9.0
12.6.2
550.127.05
1.17.0
0.17.0
v24.6.2
12.6.1
550.90.07
1.16.2
0.16.2
v24.6.1
12.5.1
550.90.07
1.16.1
0.16.2
v24.6.0
12.5.1
550.90.07
1.16.1
0.16.1
v24.3.0
12.4.1
550.54.15
1.15.0
0.15.0
v23.9.2
12.3.2
550.54.14
1.14.6
0.14.5
v23.9.1
12.3.1
535.129.03
1.14.3
0.14.3
v23.9.0
12.2.2
535.104.12
1.14.3
0.14.2
v23.6.2
12.3.1
535.104.05
1.13.4
0.14.1
v23.6.1
12.2.0
535.104.05
1.13.4
0.14.1
v23.6.0
12.2.0
535.86.10
1.13.4
0.14.1
v23.3.2
12.1.1
525.105.17
1.13.0
0.14.0
export GPU_OPERATOR_VERSION=v24.9.0
helm install --wait --generate-name \
-n gpu-operator --create-namespace \
nvidia/gpu-operator \
--version=$GPU_OPERATOR_VERSION
Option 3: Pre-Installed NVIDIA GPU Drivers
helm install --wait --generate-name \
-n gpu-operator --create-namespace \
nvidia/gpu-operator \
--version=v24.9.0 \
--set driver.enabled=false
helm install --wait --generate-name \
-n gpu-operator --create-namespace \
nvidia/gpu-operator \
--version=v24.9.0 \
--set driver.enabled=false \
--set toolkit.enabled=false
Method 2: Install Kubernetes NVIDIA Device Plugin Kubernetes NVIDIA Device Plugin Official GitHub Repo
Deploy nvidia-device-plugin DaemonSet to Kubernetes Cluster
kubectl create -f https://raw.githubusercontent.com/NVIDIA/k8s-device-plugin/v0.17.0/deployments/static/nvidia-device-plugin.yml
Check the status of NVIDIA Device Plugin DaemonSet and Pods in a Kubernetes cluster
kubectl get ds -n kube-system
kubectl get pods -n kube-system
Validation Check Pod can run GPU Jobs or not
Using NVIDIA GPU Operator Get the Pods of gpu-operator namespace in all Worker nodes
kubectl get pod -n gpu-operator -o wide
View the log output of Pod nvidia-cuda-validator deployed in all Worker nodes
Outputting cuda workload validation is successful means that GPU resources are successfully used in the Pod.
Using Kubernetes NVIDIA Device Plugin
cat <<EOF | kubectl apply -f -
apiVersion: v1
kind: Pod
metadata:
name: gpu-pod
spec:
restartPolicy: Never
containers:
- name: cuda-container
image: nvcr.io/nvidia/k8s/cuda-sample:vectoradd-cuda10.2
resources:
limits:
nvidia.com/gpu: 1 # requesting 1 GPU
tolerations:
- key: nvidia.com/gpu
operator: Exists
effect: NoSchedule
EOF
kubectl logs pod/gpu-pod
Outputting Test PASSED means that GPU resources are successfully used in the Pod.
Check node can use GPU resource or not
Using NVIDIA GPU Operator
kubectl get nodes -o wide
kubectl describe node <node name> | grep nvidia.com
# Example
kubectl describe node ubuntu-d830mt | grep nvidia.com
kubectl describe node ubuntu-ms-7d98 | grep nvidia.com
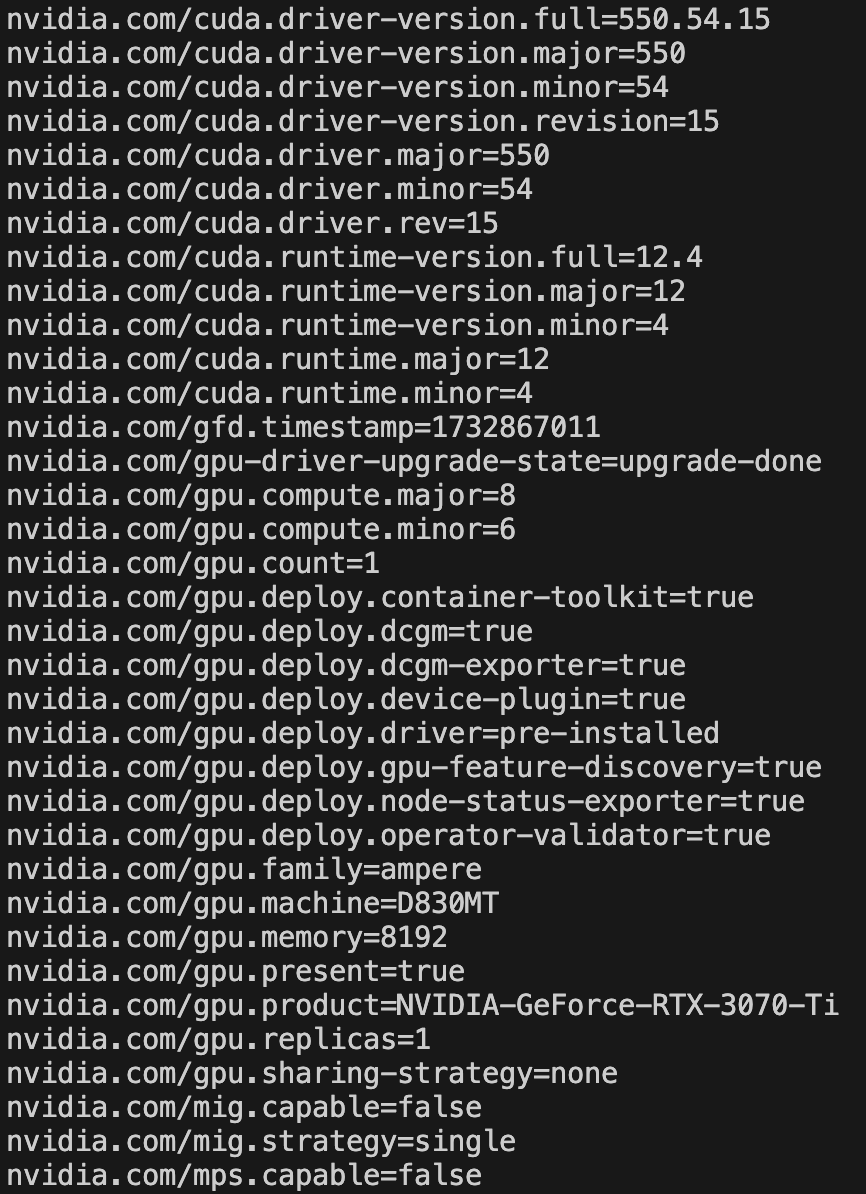
Check if the node is labeled with the following labels
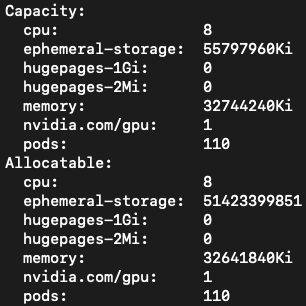
Using Kubernetes NVIDIA Device Plugin Check whether Capacity and Allocatable are displayed nvidia.com/gpu
kubectl describe node <node name>
# Example
kubectl describe node ubuntu3070ti
Last modified: 20 June 2025


